
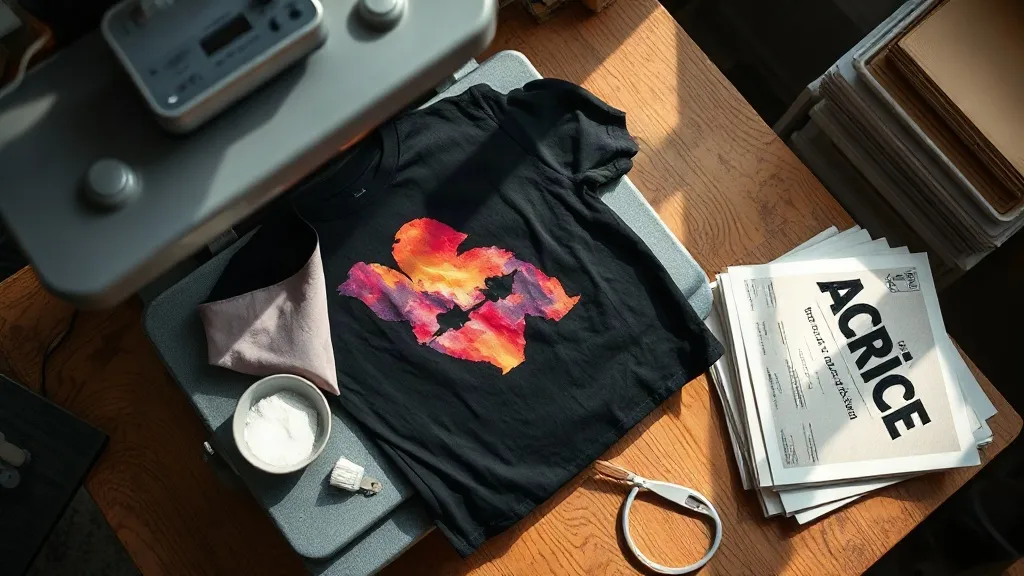
Most people meet dtf transfers on the wrong foot. They order a sheet, press it onto a cotton tee, peel too early, and end up with a cracked, plasticky patch that convinces them the whole method is overhyped. Then they try again with better film, correct powder, and a press they actually measured, and the same artwork comes out soft, stretchy, and bright enough to sell. The difference was never the technology. It was the handful of variables nobody explained on the product page.
This guide walks through those variables in the order they bite you: film, ink and powder, pressing, fabric choice, and the small habits that separate a print that survives fifty washes from one that fails in the first week.
What DTF Actually Is, Minus the Marketing
DTF stands for direct to film, and the name is the whole method. A printer lays a mirror image of the artwork onto a coated PET film using water-based pigment inks. While the ink is still wet, a hot-melt adhesive powder is scattered over it and shaken off. The sheet is then cured, which melts the powder into the ink layer and turns a fragile wet print into a flexible adhesive skin. When you press that skin onto fabric, the powder bonds to the fibers and the film peels away clean.
The important consequence: the print never touches the garment until the heat press. That is why DTF works on cotton, polyester, blends, canvas, nylon, and even leather, while a direct-to-garment printer needs a pre-treatment and still struggles on high-polyester fabrics. The adhesive is doing the heavy lifting, not the fabric surface.
Where the Method Fits in a Small Shop
If you already own a heat press, DTF lets you produce full-color, photo-quality transfers without buying a DTG machine or a screen setup. Pre-printed sheets from a supplier mean you can offer apparel without owning a printer at all, which makes it a low-risk way to test a product line. Once volume justifies it, an in-house printer cuts the per-unit cost and lets you turn orders around the same day.
Film Choice Changes Everything
Not all PET film is the same, and the coating is where the difference lives. A single-sided film releases cleanly on one face and grips the powder on the other. A double-sided film has coating on both faces, which helps in some printer setups but can cause you to load the sheet the wrong way and waste a run.
Cold-peel and hot-peel films behave differently at the press:
- Cold peel requires the transfer to cool fully before the film comes off. The print stays sharper and slightly more matte, and it is far more forgiving on fine detail and small text.
- Hot peel lets you strip the film while the sheet is still warm. It is faster for production runs but punishes hesitation, because a partly cooled sheet can drag ink and leave a ghost edge.
Film thickness matters too. Thin film hugs contours on sleeves and hems; thick film is more forgiving to handle but can feel like a sticker on lightweight shirts. If you sell premium blanks, test the film on your actual blank before committing to a full roll.
Powder: The Step Most People Rush
Powder is the adhesive, so its application decides durability. Two failures dominate:
- Too little powder. The print looks fine after pressing, then starts lifting at the edges after a few washes because the adhesive layer is patchy.
- Too much powder. Excess powder cures into a stiff crust, dulls colors, and can leave a sandy residue on the press platen that eventually transfers onto unrelated garments.
The goal is an even, single coat that saturates the wet ink without piling up. Shake the sheet gently, tap off the excess, and check the surface at an angle under good light. Any shiny wet patches mean the powder has not settled there yet. Cure exactly as the powder manufacturer specifies; undercured powder feels tacky and will stick to the film, while overcured powder turns brittle and yellows over time.
Press Settings That Actually Work
Published settings are a starting point, not a law. Platen temperature, pressure, and dwell time interact, and a press that reads 160°C on the display may be delivering something different at the surface. An infrared thermometer is one of the cheapest upgrades you can make.
A reasonable baseline for pressing a cured transfer onto a cotton or cotton-blend shirt:
- Temperature: around 150 to 160°C, depending on the film and powder spec
- Pressure: medium to firm, enough that you can see the fabric texture through the film
- Time: 10 to 15 seconds for the main press
- Second press: after peeling, a short 5-second press with a cover sheet to lock the edges
Two habits matter more than the numbers. First, pre-press the garment for a few seconds to drive out moisture; trapped dampness creates bubbles and weak adhesion. Second, use a cover sheet or protective paper over the transfer so the film does not stick to the platen and the print gets an even, glossy-free finish.
Pressure Is the Variable People Ignore
Light pressure leaves the adhesive sitting on top of the fabric rather than inside it. The print looks fine on day one and starts flaking at the edges within a couple of washes. If your transfers fail at the perimeter while the center holds, pressure or dwell time is almost always the cause, not the powder.
Matching Transfers to Fabric
Different fibers need different handling, and getting this wrong is the most common source of customer complaints.
Cotton and Cotton Blends
The easiest surface. Moderate temperature, medium pressure, and a solid pre-press give excellent results. Fine detail holds well, which makes these the best blanks for small logos and text-heavy designs.
High-Polyester and Performance Wear
Polyester is sensitive to heat and can scorch, glaze, or shrink under a hot platen. Lower the temperature, extend the dwell time slightly, and always test on an offcut. Some polyester dyes sublimate into the adhesive layer at high heat, which shows up as a faint color halo behind light areas. A lower-temperature press and a slightly thicker film usually solve it.
Nylon, Canvas, and Leather
These need a test press every time. Nylon can repel the adhesive unless it is pre-pressed well, and coated canvas may need a longer dwell. Leather and faux leather tolerate lower heat but demand short, firm presses so the surface grain does not flatten.
Care Instructions You Should Hand to Every Customer
Durability is a shared responsibility. A print that was pressed correctly will still fail if it goes through a hot dryer cycle every week. Print a care card or add a line to your packaging:
- Wash inside out in cold or cool water
- Skip fabric softener, which coats the adhesive layer
- Tumble dry low or hang dry
- Do not iron directly on the print; press from the reverse or use a cloth
- Wait at least 24 hours after pressing before the first wash
That last point surprises people. The adhesive continues to settle after the press, and washing too soon is a common cause of early lifting.
When to Order Pre-Printed and When to Print In-House
Pre-printed sheets make sense when you need a small batch, a one-off gift, or a design you are still testing. You avoid capital cost and can compare film and powder quality across suppliers without buying equipment. If you are searching for dtf transfers near me, check turnaround time and whether the supplier ships gang sheets, which let you place many small designs on one sheet and cut waste.
In-house printing wins once your monthly transfer volume is steady and your designs change often. The break-even point depends on printer cost, ink yield, film price, and how much of your week you can give to maintenance. Be honest about that last part. A printer that sits idle for two weeks clogs, and unclogging it costs more time than the money it saved.
Quick Fixes for Common Failures
Print lifts at the edges after washing. Increase pressure or dwell time, add a second short press after peeling, and check powder coverage at the perimeter.
Film will not release cleanly. The sheet cooled too much on a hot-peel film, or the print was undercured. Re-press briefly with a cover sheet and peel while warm if the film allows.
Colors look dull or washed out. Excess powder is sitting on the ink surface. Reduce powder, shake more thoroughly, and verify cure temperature.
Print feels stiff and plastic-like. Thick film plus heavy powder. Switch to a thinner film and a lighter powder coat, especially for large solid areas.
Ghosting or double edges. The transfer shifted during pressing. Tape the corners or hold the film steady until the platen closes.
Frequently Asked Questions
How many washes should a good DTF transfer survive?
A correctly pressed transfer on a compatible fabric, washed inside out in cool water and dried low, typically holds up for dozens of wash cycles. Results depend far more on press pressure, powder coverage, and cure than on the film brand alone.
Can I press DTF onto a shirt that already has a print on it?
You can, but the existing print is a surface the adhesive cannot grip properly. Placement over seams, zippers, or thick screen-print layers usually leads to lifting. Press onto flat, clean fabric whenever possible.
Do I need a commercial heat press, or will an iron work?
An iron can produce a transfer that looks acceptable, but it cannot deliver even pressure across the sheet. Edges and corners are the first to fail. For anything you intend to sell, a press with a temperature readout and adjustable pressure is the practical minimum.
Why does my transfer look glossy compared to the sample I was sent?
Gloss usually comes from excess powder or a press that is too hot for too long. Compare your powder coat and dwell time against the supplier's spec, and try a cover sheet during the second press to even out the surface.
Is DTF safe for children's clothing?
The cured adhesive and pigment inks used in reputable dtf systems are formulated for apparel use, and the finished print is wash-fast. Ask your supplier for material safety documentation if you produce for children, and always follow their cure instructions rather than improvising.